

Trading involves the exchange of assets with value to others of the similar or
same value. More so, digital assets are also of value which means digital exchanges can be made possible through centralised or Decentralised exchanges (DEX).
So what is a DEX?

What is a Dex(Decentralised Exchange)
A decentralized exchange (DEX) is a type of cryptocurrency exchange that operates on a distributed ledger technology (DLT) or blockchain network, where users can trade cryptocurrencies directly without the need for a central authority or intermediary.
The most popular platforms for Trading digital currency are Uniswap, pancake swap,1inc e.t.c are various Decentralised platforms to trade cryptocurrency.
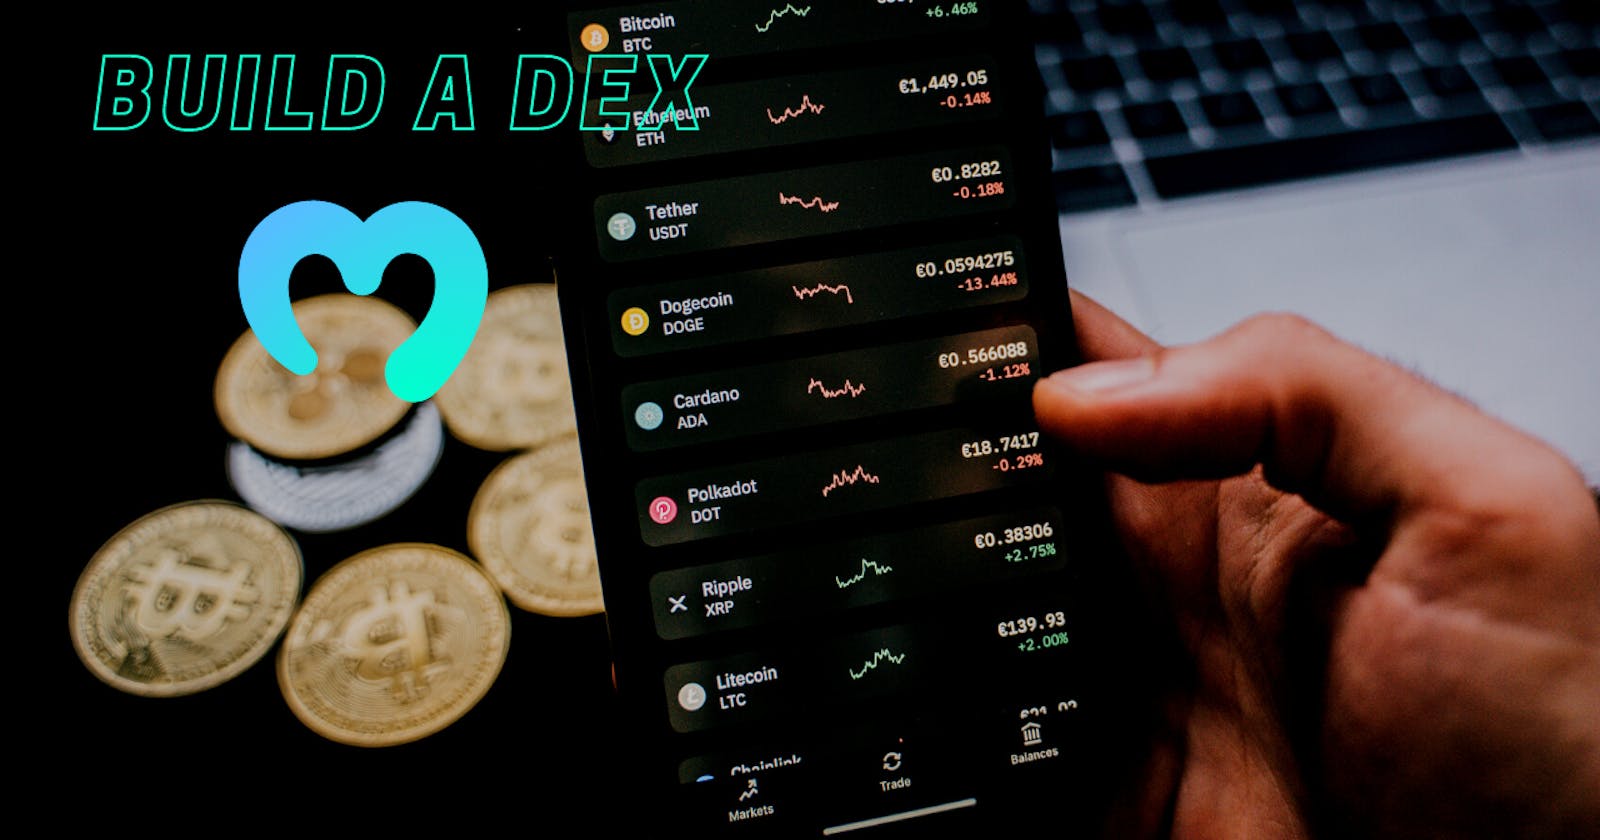
In this tutorial, you are going to build a full-stack Dex using moralis API for token price data.
Prerequisite
To follow along with this tutorial, you need to have a good understanding of the following:
Javascript
Nextjs
Let Get started
First off run the following command to install nextjs
npx create-next-app@latest
Do the following:
Rename your app
select
nofortypescriptnoforESLintyesfor thesrc/directorynoexperimentalapp/directory
Once the installation is complete, run the commands below after you have cd into the project folder to start the development server:
npm run dev
install the following packages
npm i axios moralis antd wagmi
Axiosis a popular JavaScript library that is used to make HTTP requests from a web browser or Node.js. It provides an easy-to-use API that supports promises and async/await syntax for making requests and handling responses.antdalso known as Ant Design, is a popular UI library for React applications. It provides a set of reusable components that help developers to build user interfaces with ease.wagmiis a collection of React Hooks containing everything you need to start working with Ethereum. wagmi makes it easy to "Connect Wallet," display ENS and balance information, sign messages, interact with contracts, and much more — all with caching, request deduplication, and persistence.
N/B : keep up on further tutorial on wagmi Hooks
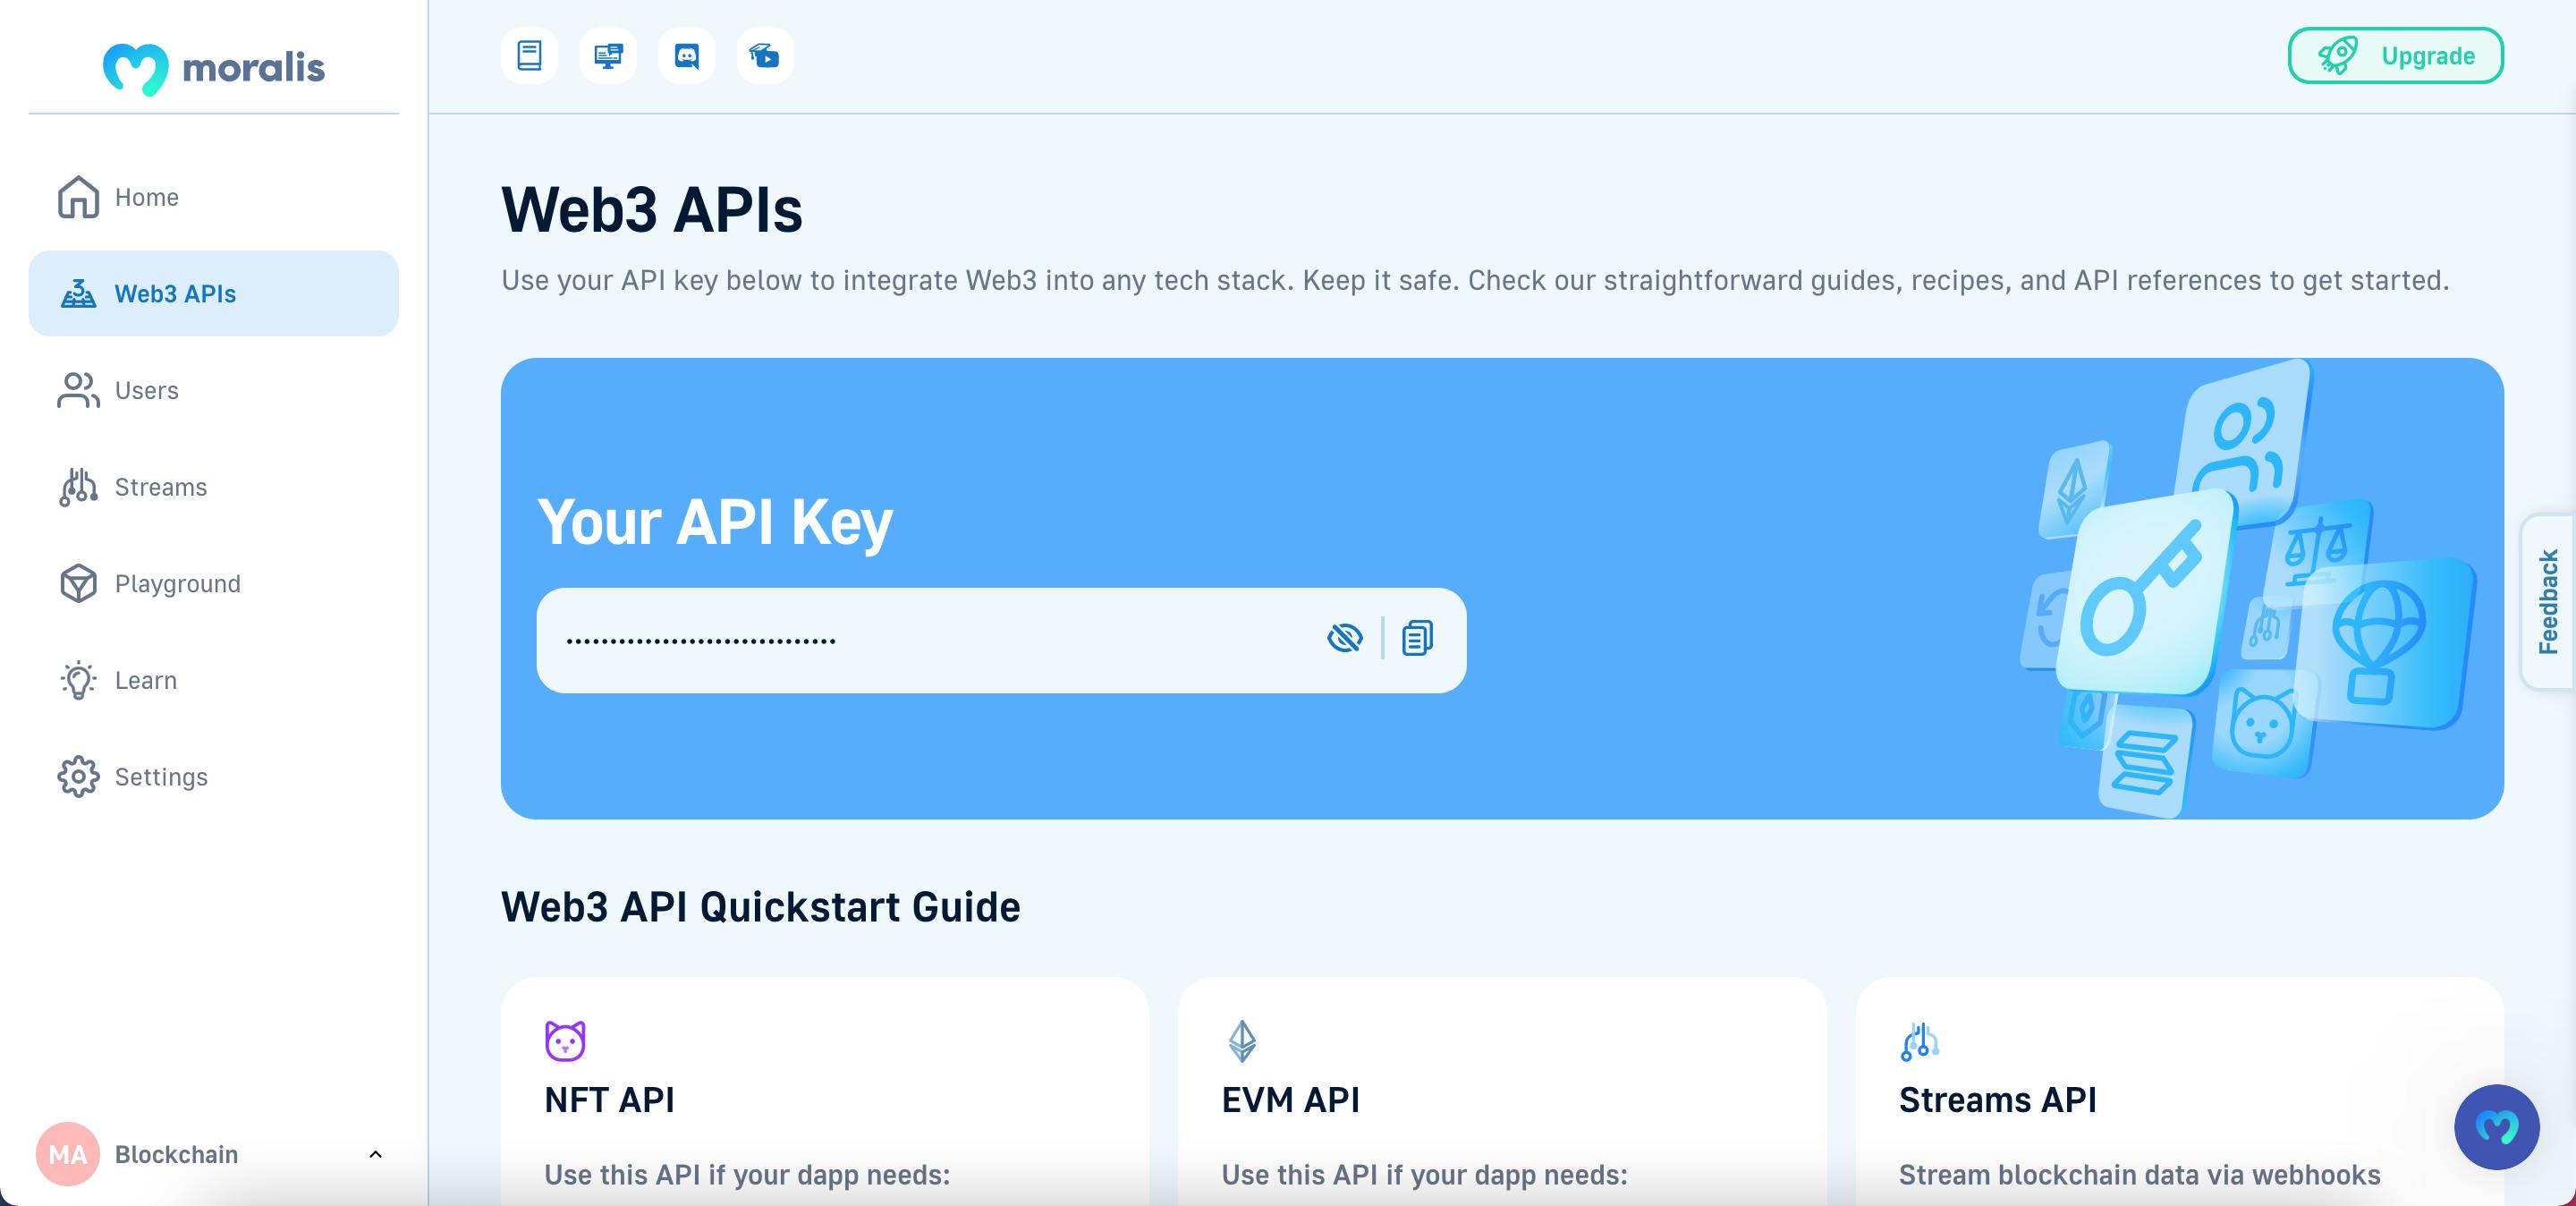
Moralis
Moralis provides world-class APIs to developers across the globe, allowing companies and projects of all sizes to seamlessly integrate blockchain into their solutions stack and scale with ease.
Sign up for Moralis to get an API KEY
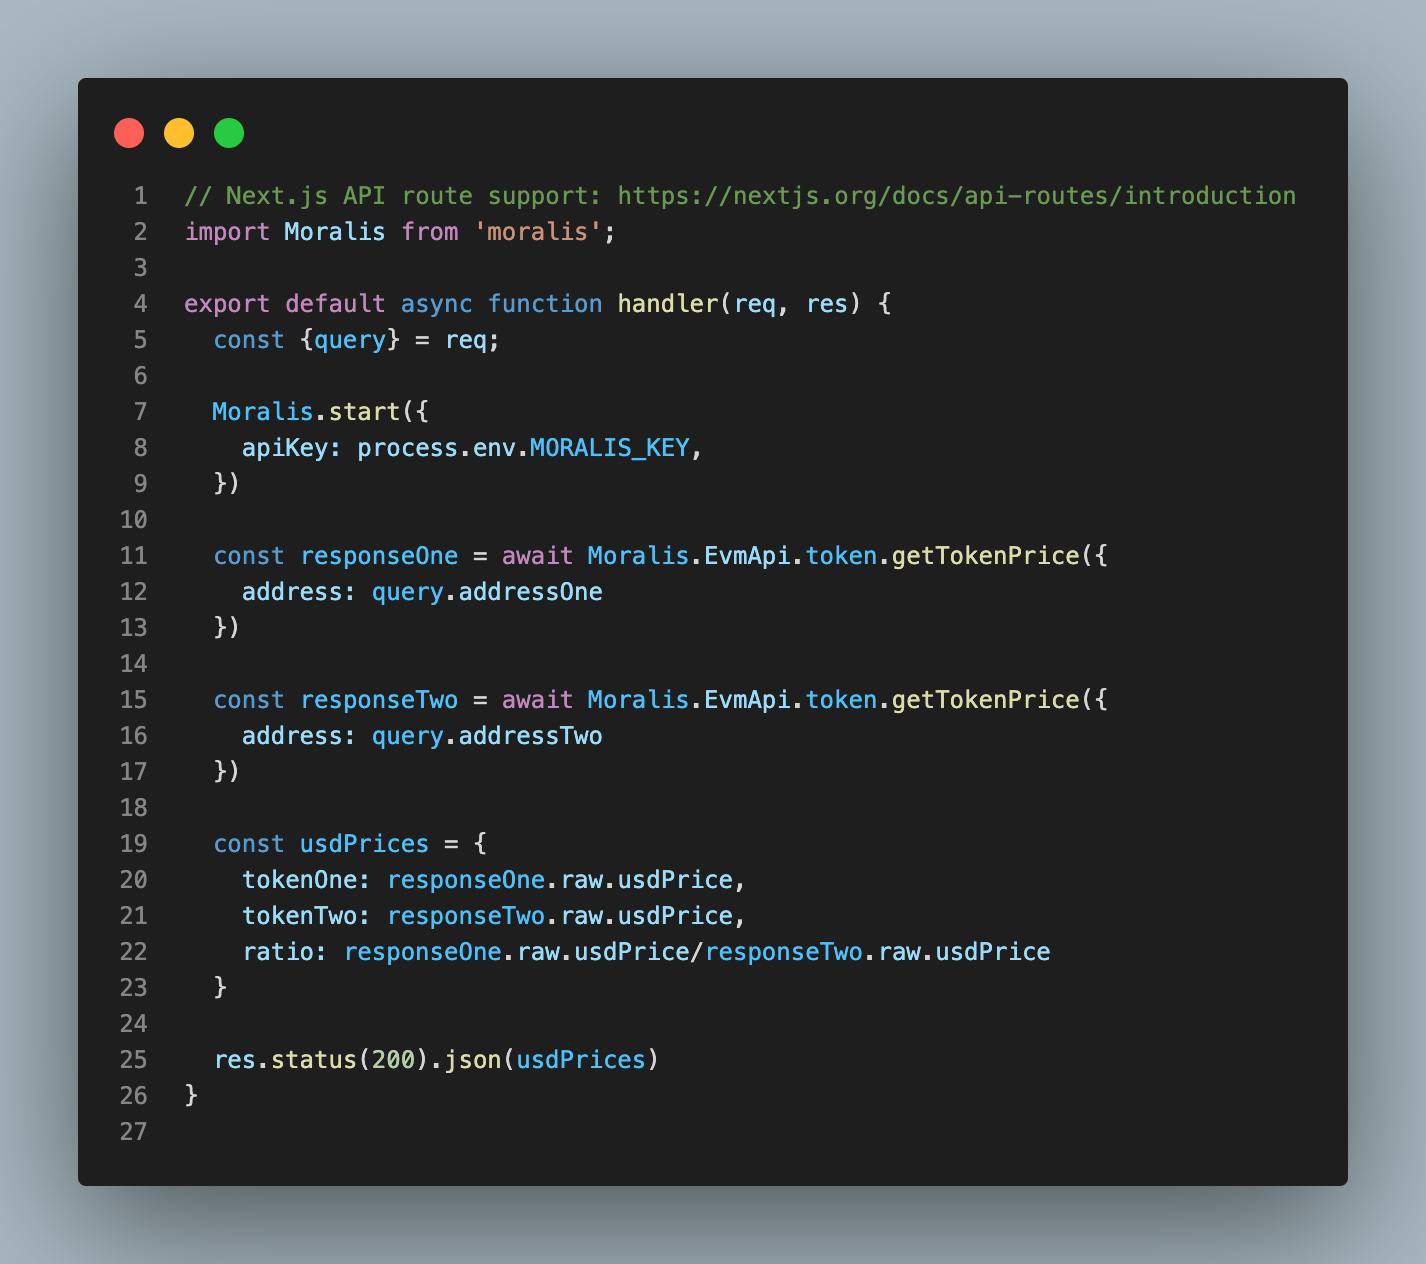
create a file .env to store your secret API key
Next under the page/api folder in your src directory create a file name tokenprice.js
Write the code
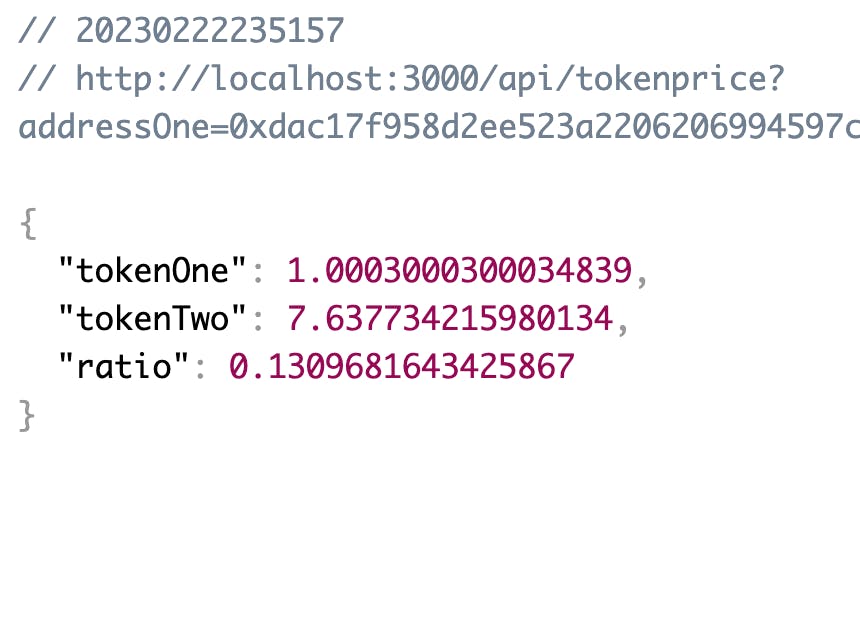
To make sure your api is working type on your browser to get token price
http://localhost:3000/api/tokenprice?addressOne=0xdac17f958d2ee523a2206206994597c13d831ec7&addressTwo=0x514910771af9ca656af840dff83e8264ecf986ca
Application setup
This is the price of Usdc to a Link token, to get all token addresses goto the GitHub link. To connect with Metamask we use wagmi Hook in the _app.js file to wrap the component's props and provide the supported chain network to connect to your application
Check out the wagmi supported chain for further information.
import '@/styles/globals.css'
import { configureChains, mainnet, WagmiConfig,goerli, createClient } from "wagmi";
import { publicProvider } from "wagmi/providers/public";

const { provider, webSocketProvider } = configureChains(
  [goerli,mainnet],
  [publicProvider()]
);

const client = createClient({
  autoConnect:true,
  provider,
  webSocketProvider
})

export default function App({ Component, pageProps }) {
  return (
      <WagmiConfig client={client}>

            <Component {...pageProps} />

      </WagmiConfig>
)}
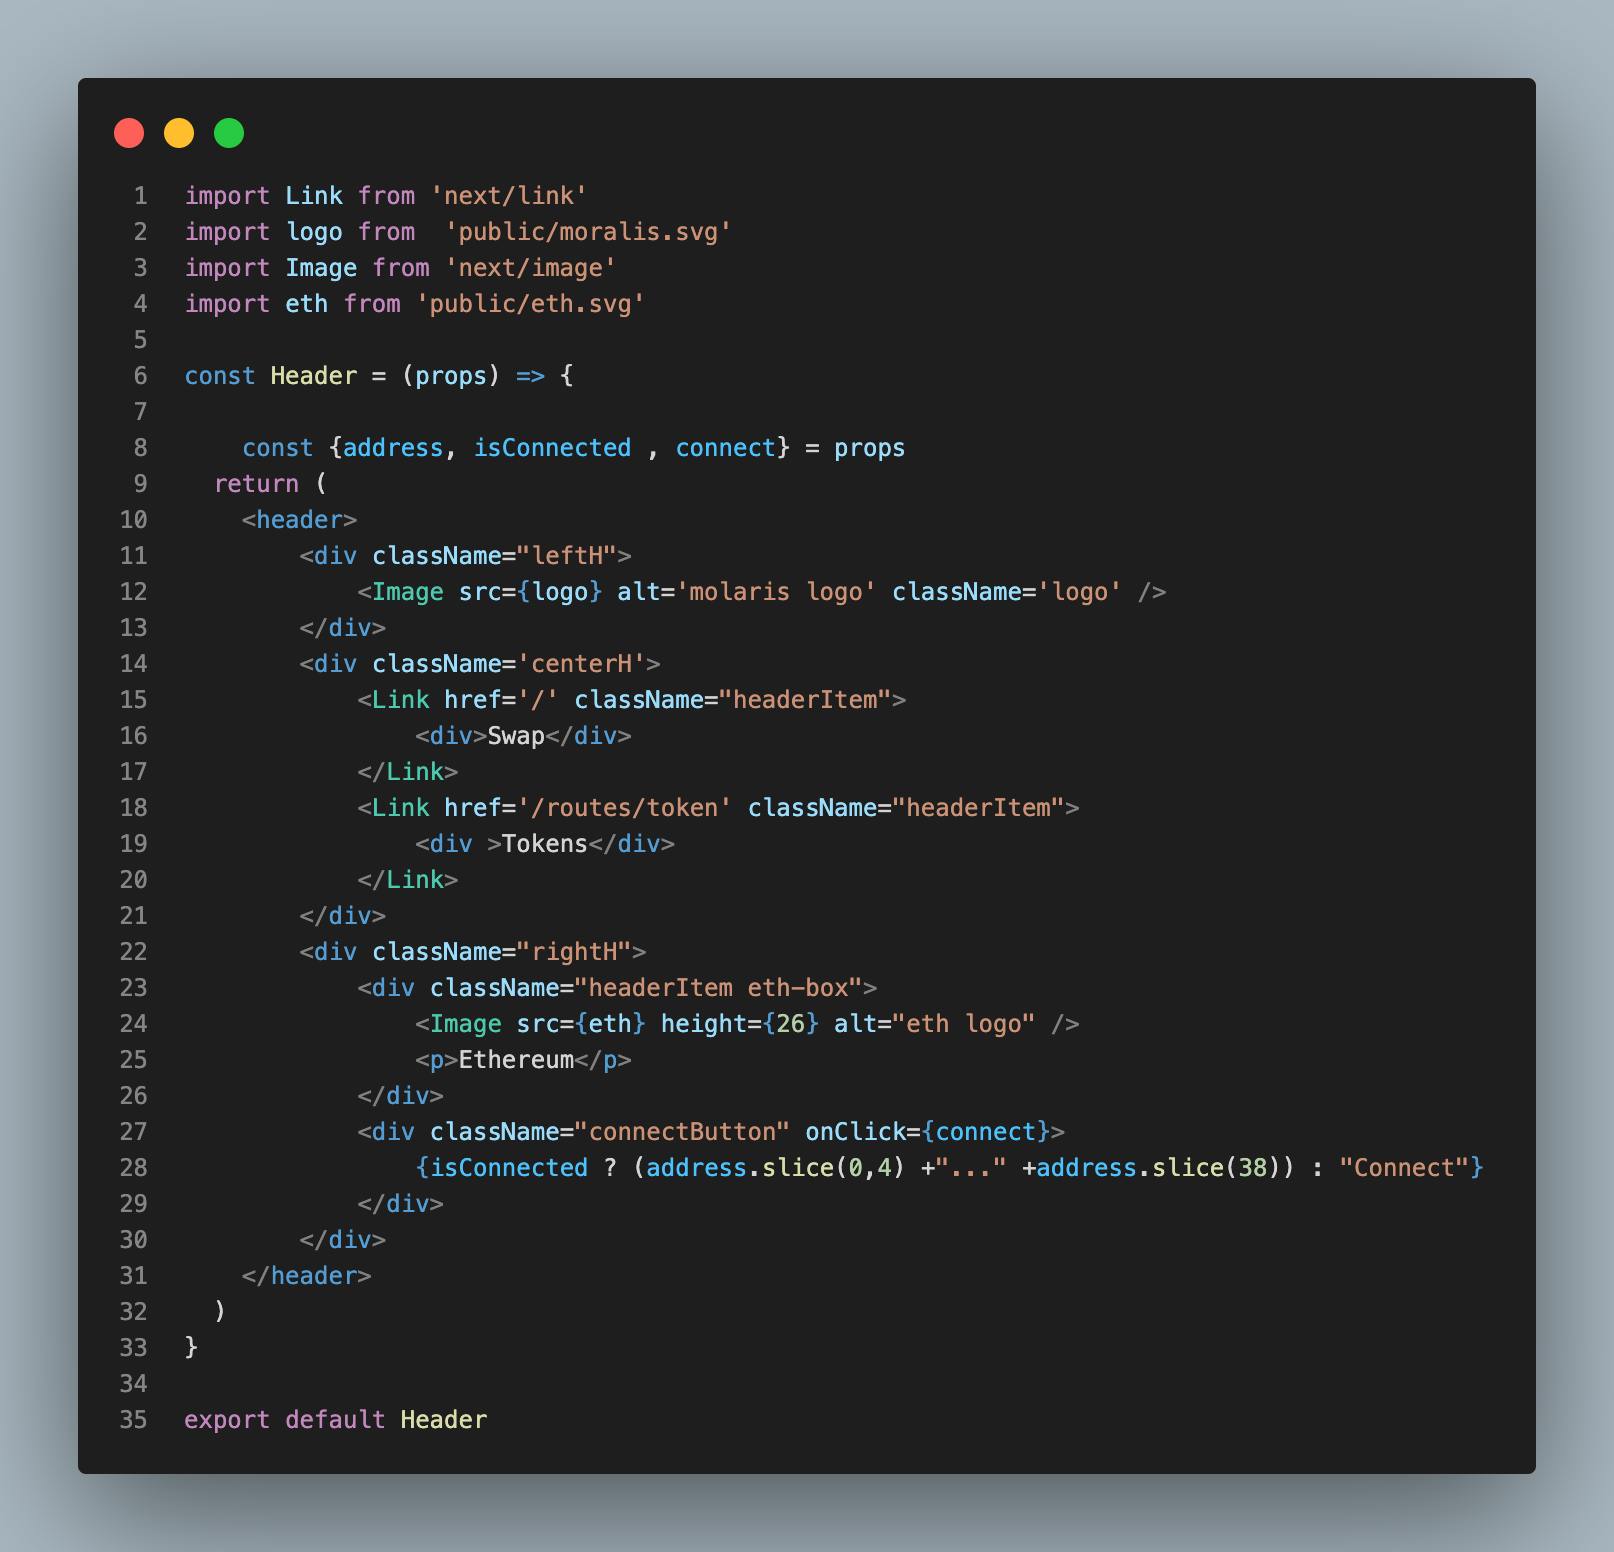
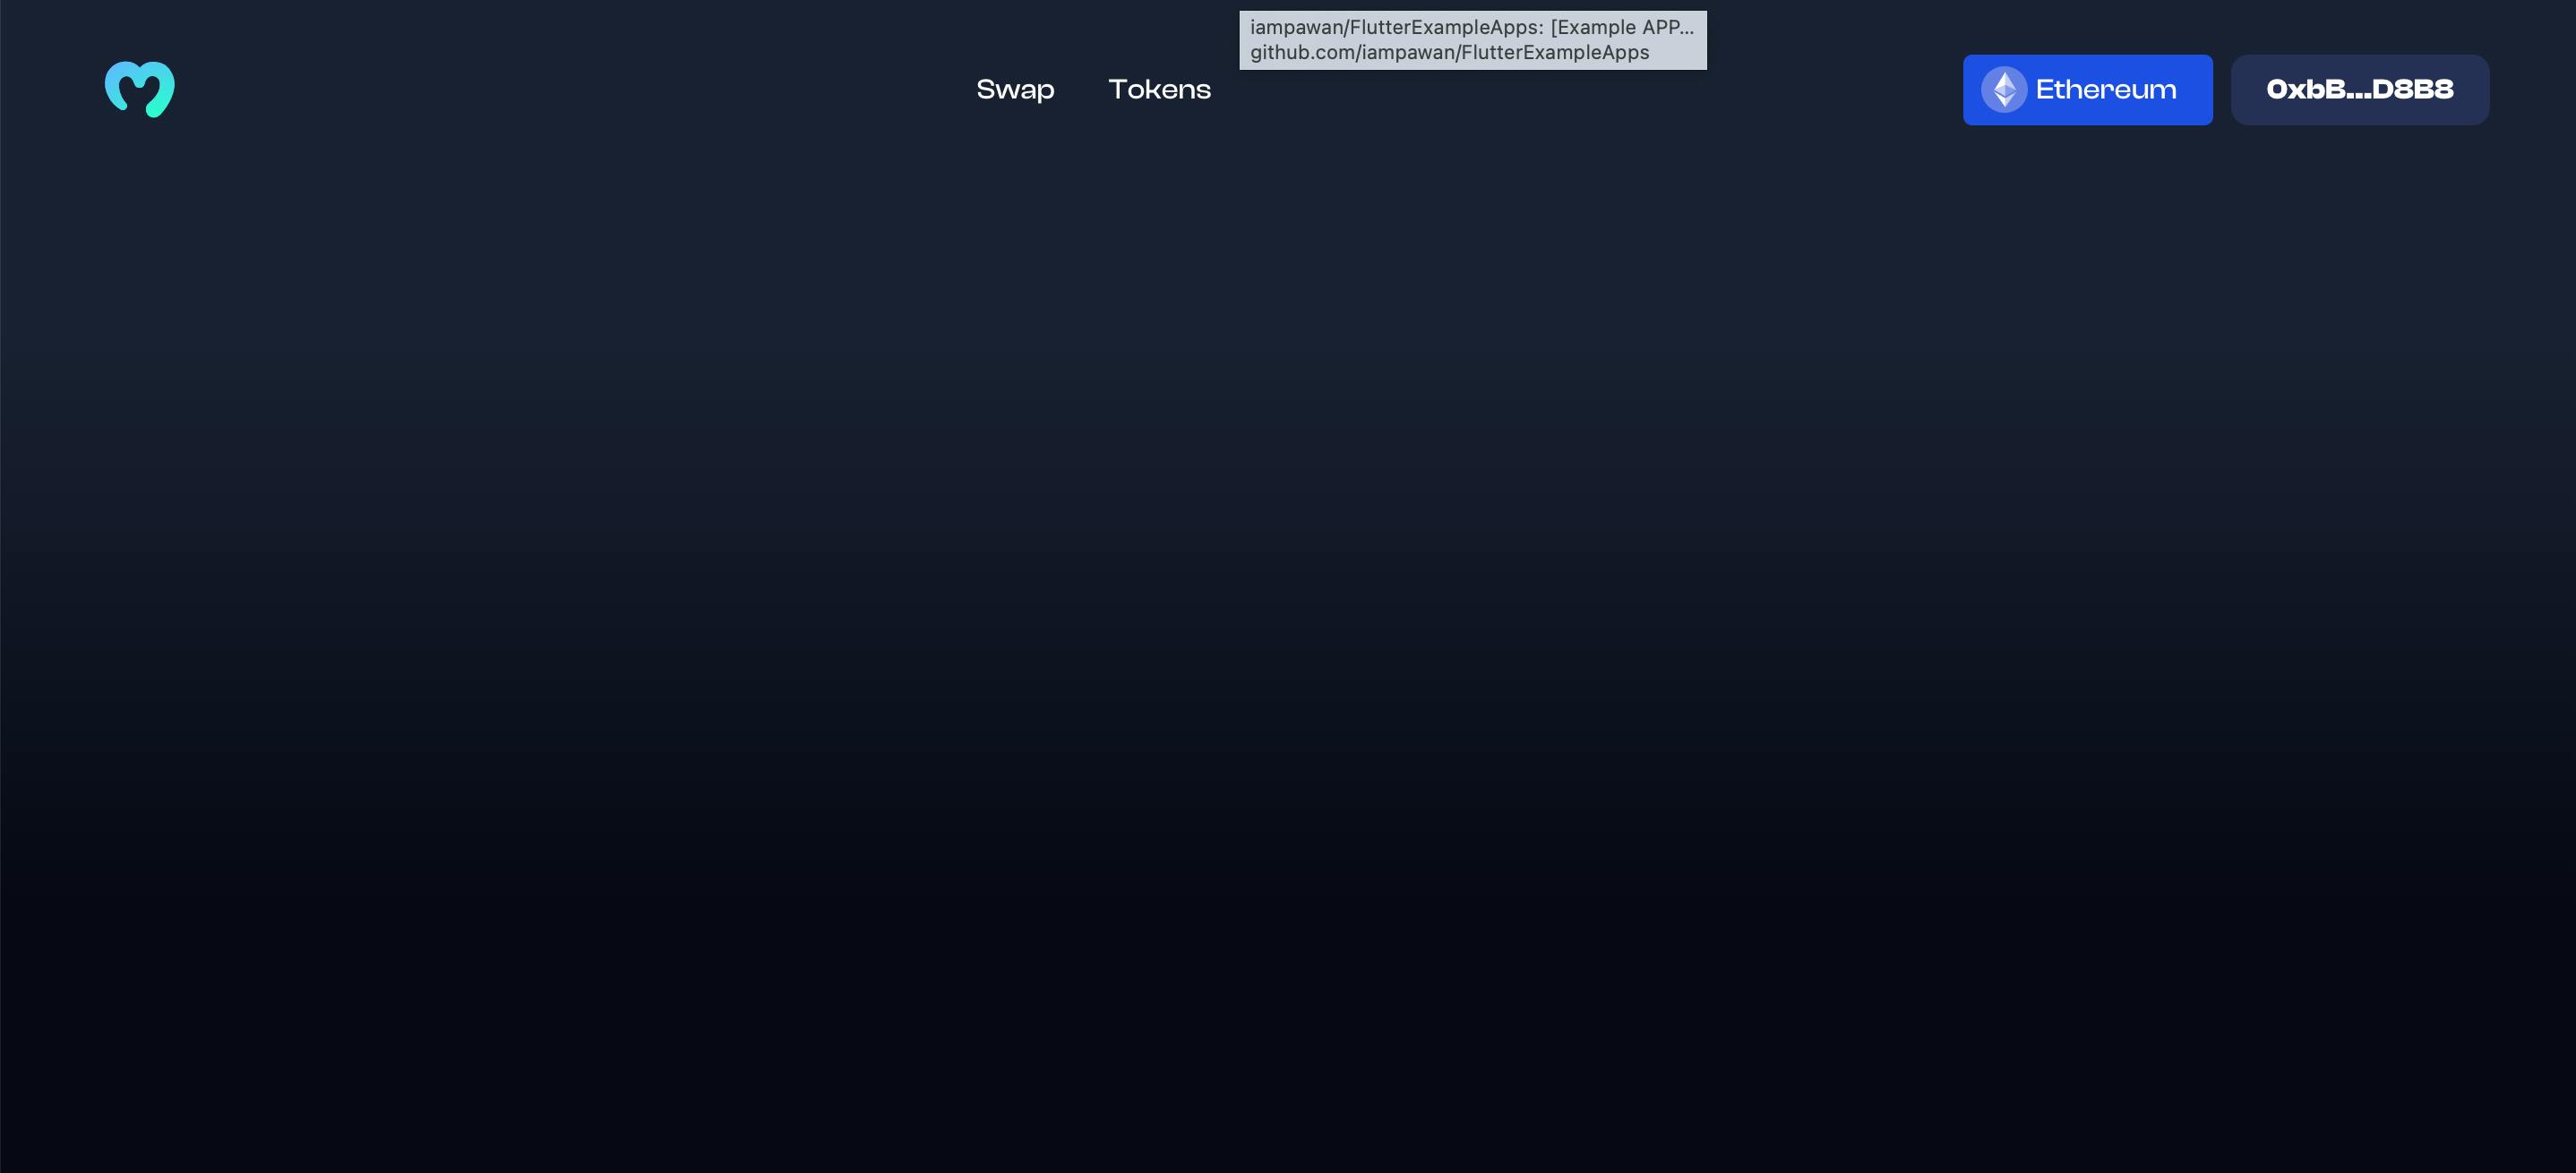
Next, create the file src/component/header.jsx and add the code below. The address and isconnected props get the address of the user's wallet and check to see if the user is connected to the app respectfully. The Header contains the Page icon, swap and token route and the address display that check if the wallet is connected to the application.
To get the image assets access the github link.
Now under the header file create a layer.jsx file to contain the navbar header.
import { useConnect, useAccount } from "wagmi";
import { MetaMaskConnector } from "wagmi/connectors/metaMask";
import Header from '@/components/Header'


const Layout = ({ children }) => {
    const { address, isConnected } = useAccount();
    const { connect } = useConnect({
        connector: new MetaMaskConnector(),
    });

    return (
      <div className="content">
        <Header connect={connect} isConnected={isConnected} address={address} />
        { children }
      </div>
    );
}

export default Layout
In the _app.jsx file wrap the component's props with the Layer Tag, this ensure the navigation bar is always present in any routes taken by the user.
    <WagmiConfig client={client}>
         <Layer>
            <Component {...pageProps} />
         </Layer>
    </WagmiConfig>
Add the following css code to the gobal.css in the style folder.
body {
  margin: 0;
  font-family: 'Clash Display', sans-serif;
  -webkit-font-smoothing: antialiased;
  -moz-osx-font-smoothing: grayscale;
  height: 100vh;
  width: 100vw;
  background-color: rgb(25, 33, 52) !important;
  background: rgb(25, 33, 52);
  background: linear-gradient(
    180deg,
    rgba(25, 33, 52, 1) 28%,
    rgba(7, 8, 21, 1) 75%
  );
  color: white;
}

* {
  box-sizing: border-box;
  padding: 0;
  margin: 0;
  font-family: 'Clash Display', sans-serif;
  font-weight: 500px;
}

a {
  color: inherit;
  text-decoration: none;
}

@media (prefers-color-scheme: dark) {
  html {
    color-scheme: dark;
  }
}

header {
  height: 100px;
  display: flex;
  justify-content: space-between;
  align-items: center;
  padding-left: 50px;
  padding-right: 50px;
}

.logo{
  padding-right: 20px;
}

.eth{
  padding-right: 10px;
}

.leftH {
  display: flex;
  align-items: center;
  gap: 10px;
}

.centerH{
  display: flex;
}

.rightH {
  display: flex;
  align-items: center;
  justify-content: flex-end;
  gap: 10px;
}

.headerItem {
  padding: 10px;
  padding-left: 15px;
  padding-right: 15px;
  border-radius: 5px;
  font-weight: 500;
  transition: 0.3s;
  display: flex;
  align-items: center;
}

.eth-box{
  background-color: #1748e8;
  padding: 5px;
  padding-left: 10px;
  padding-right: 15px;
  border-radius: 5px;
  font-weight: 500;
  transition: 0.3s;
  display: flex;
  align-items: center;
}

.eth-box p{
  margin: 5px;
}

.connectButton {
  background-color: #243056;
  padding: 10px;
  padding-right: 20px;
  padding-left: 20px;
  border-radius: 10px;
  color: #fff;
  font-weight: bold;
  transition: 0.3s;
}

.connectButton:hover {
  cursor: pointer;
  color: #3b4874;
  border: 2px solid white;
}
.mainWindow {
  margin-top: 40px;
  display: flex;
  justify-content: center;
}
Edit the code in the index.jsx file and add the mainWindow css class to the main tag.
import Head from 'next/head'
import Swap from '@/routes/Swap'
import { Inter } from '@next/font/google'


const inter = Inter({ subsets: ['latin'] })

export default function Home() {


  return (
    <>
      <Head>
        <title>Moralis Dex</title>
        <meta name="description" content="Generated by create next app" />
        <meta name="viewport" content="width=device-width, initial-scale=1" />
        <link rel="icon" href="/favicon.ico" />
      </Head>
      <main className='mainWindow'>

      </main>
    </>
  )
}
Once you've finished editing the file, save it and you should see a nice-looking clean main screen.
Now it looks good well done reward yourself.

Swapping Page
Now that we are done with little part of our application we have connected the wallet to the application we have their wallet address, we can continue to the main function of the application in this part.
In this part, we are going to use Axios to fetch token prices and use the 1inch api to swap our token with the token address we download earlier.
create the folder routes/swap.jsx in the page directory and add the following code
import { useState , useEffect} from "react"
import { Input, Popover, Radio, Modal, message } from "antd";
import { useSendTransaction, useWaitForTransaction } from "wagmi";
import axios from "axios";
import {
    ArrowDownOutlined,
    DownOutlined,
    SettingOutlined,
  } from "@ant-design/icons";
import tokenList from '@/tokenList.json'
import Image from "next/image";

const Swap = (props) => {
return (
    <h1>SWap</h1>
);
}
export default Swap
Setting up the Trade functions
In the above code snippet, add to the code above the state component and their functionality below.
    const { address, isConnected } = props;
    const [slippage, setSlippage] = useState(2.5);
    const [tokenOneAmount, setTokenOneAmount] = useState(null);
    const [tokenTwoAmount, setTokenTwoAmount] = useState(null);
    const [tokenOne, setTokenOne] = useState(tokenList[0]);
    const [tokenTwo, setTokenTwo] = useState(tokenList[1]);
    const [isOpen, setIsOpen] = useState(false);
    const [changeToken, setChangeToken] = useState(1);
    const [prices, setPrices] = useState(null);
    const [messageApi, contextHolder] = message.useMessage();
    const [txDetails, setTxDetails] = useState({
        to:null,
        data: null,
        value: null,
    });
In the above code, we define the following state prop:
Address: The address uses the wagmi hook to get the user wallet address.isconnected :using the wagmi react hook to check if the app is connected to metamask or a specified wallet the user chooses.silage: is set to2.5, which is the default value. Whenever the value ofslippagechanges, React will automatically re-render the component to reflect the new value.tokenAmount:state gets token prices from the moralis APItokenOneandtokenTwoset the token address from thetokenList.jsonprovide in the GitHubchangeTokenstate set the token address to be exchange.txDetailsandmessageApiuses the wagmi hook to get the transaction details and messages from the contract transactionspricesstate props set the equivalent prices of thetokenOnetotokenTwofrom the Moralis api call.
const {data, sendTransaction} = useSendTransaction({
        request: {
          from: address,
          to: String(txDetails.to),
          data: String(txDetails.data),
          value: String(txDetails.value),
        }
})

    const { isLoading, isSuccess } = useWaitForTransaction({
        hash: data?.hash,
    })

    function handleSlippageChange(e) {
        setSlippage(e.target.value);
      }


      function changeAmount(e) {
        setTokenOneAmount(e.target.value);
        if(e.target.value && prices){
          setTokenTwoAmount((e.target.value *prices.ratio).toFixed(2))
        }else{
          setTokenTwoAmount(null);
        }
      }

    // fetching price
 async function fetchPrices(one,two){
    const res = await axios.get('http://localhost:3000/api/tokenprice'{params:{addressOne: one, addressTwo: two}})
    setPrices(res.data)
      }

      function openModal(asset) {
        setChangeToken(asset);
        setIsOpen(true);
      }

      function modifyToken(i){
        setPrices(null);
        setTokenOneAmount(null);
        setTokenTwoAmount(null);
        if (changeToken === 1) {
          setTokenOne(tokenList[i]);
          fetchPrices(tokenList[i].address, tokenTwo.address)
        } else {
          setTokenTwo(tokenList[i]);
          fetchPrices(tokenOne.address, tokenList[i].address)
        }
        setIsOpen(false);
      }

   async function fetchDexSwap(){

        const allowance = await axios.get(`https://api.1inch.io/v5.0/1/approve/allowance?tokenAddress=${tokenOne.address}&walletAddress=${address}`)

   if(allowance.data.allowance === "0"){
    const approve = await axios.get(`https://api.1inch.io/v5.0/1/approve/transaction?tokenAddress=${tokenOne.address}`)
    setTxDetails(approve.data);
            console.log("not approved")
}

     const tx = await axios.get(
            `https://api.1inch.io/v5.0/1/swap?fromTokenAddress=${tokenOne.address}&toTokenAddress=${tokenTwo.address}&amount=${tokenOneAmount.padEnd(tokenOne.decimals+tokenOneAmount.length, '0')}&fromAddress=${address}&slippage=${slippage}`)

          let decimals = Number(`1E${tokenTwo.decimals}`)
      setTokenTwoAmount((Number(tx.data.toTokenAmount)/decimals).toFixed(2));

          setTxDetails(tx.data.tx);

      }

const settings = (
        <>
          <div>Slippage Tolerance</div>
          <div>
            <Radio.Group value={slippage} onChange={handleSlippageChange}>
              <Radio.Button value={0.5}>0.5%</Radio.Button>
              <Radio.Button value={2.5}>2.5%</Radio.Button>
              <Radio.Button value={5}>5.0%</Radio.Button>
            </Radio.Group>
          </div>
        </>
      );

useEffect(()=>{fetchPrices(tokenList[0].address,tokenList[1].address)}, [])

   useEffect(()=>{if(txDetails.to && isConnected){sendTransaction();
        }
    }, [txDetails])

    useEffect(()=>{

        messageApi.destroy();

        if(isLoading){
          messageApi.open({
            type: 'loading',
            content: 'Transaction is Pending...',
            duration: 0,
          })
        }

      },[isLoading])

      useEffect(()=>{
        messageApi.destroy();
        if(isSuccess){
          messageApi.open({
            type: 'success',
            content: 'Transaction Successful',
            duration: 1.5,
          })
        }else if(txDetails.to){
          messageApi.open({
            type: 'error',
            content: 'Transaction Failed',
            duration: 1.50,
          })
        }
Here the functions :
useSendTransaction: hook is a custom hook provided by the wagmi library or module, and it is used to handle sending transactions in a blockchain environment.from: The address of the sender of the transaction.to: The address of the recipient of the transaction.data: The data to be included in the transaction, which can include additional instructions or parameters.value: The value to be transferred in the transaction, which is typically denominated in a cryptocurrency.
useWaitforTransaction:wagmi custom hook to check the status of the transactions.handleslipage: the function that set the slippage ratio of the token prices.changeAmount: the functionality takes an event objecteas its parameter. The event handler that is called when the user inputs a value into a form field, and it is used to update the state of two variables,tokenOneAmountandtokenTwoAmount.fetchPrices :asynchronous function used to retrieve the current price or exchange rate between the two tokens.modifyToken: this function set the specified token to be traded or exchanged.fetchDexSwap: An asynchronous function to swap between two tokens using the 1inch API.settingsfunction displays the token slippage percentage to select from an option of0.5%,2.5%and5.0%
The useEffect loads the token prices when the application loads.
App UI
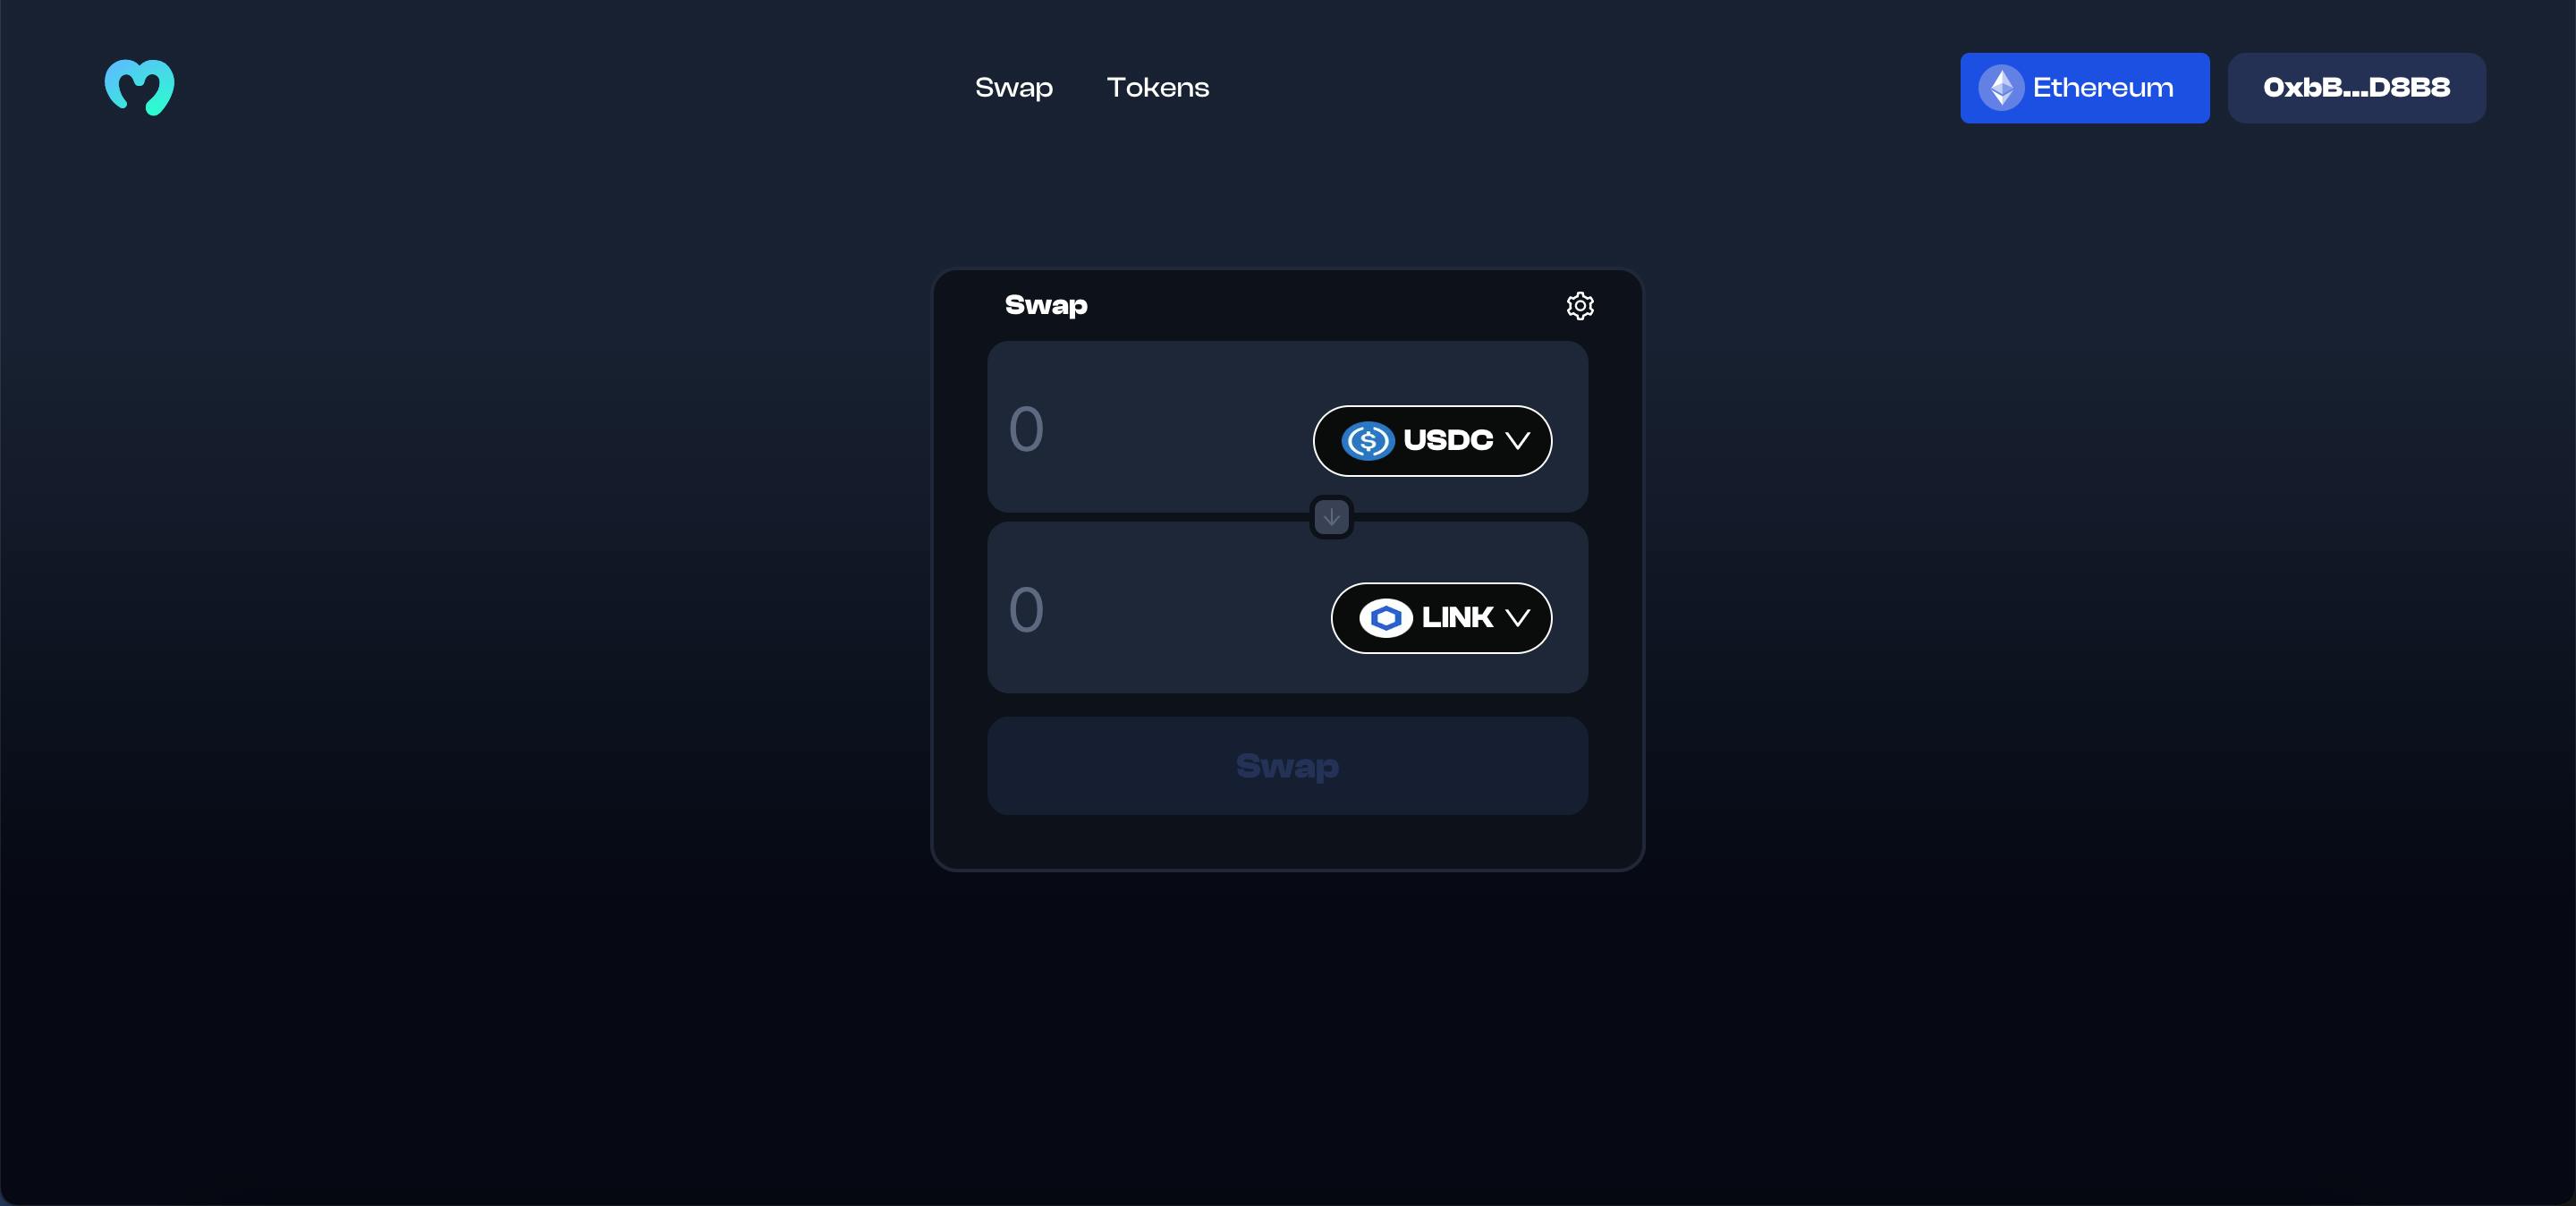
Now we done with the functionality of the application let focus on the UI components, copy the ui code below in the return swap function.
  <div className="tradeBox">
       <div className="tradeBoxHeader">
                <h4>Swap</h4>
                <Popover
                    content={settings}
                    title="Settings"
                    trigger="click"
                    placement="bottomRight">
                    <SettingOutlined className="cog" />
                </Popover>
            </div>
            <div className="inputs">
                <Input
                    placeholder="0"
                    value={tokenOneAmount}
                    onChange={changeAmount}
                    disabled={!prices}
                />
                <Input placeholder="0" value={tokenTwoAmount} disabled={true} />
                <div className="switchButton" >
                    <ArrowDownOutlined className="switchArrow" />
                </div>
               <div className="assetOne" onClick={() =>openModal(1)}>
                    <Image width={30} height={40} src={tokenOne.img} alt="assetOneLogo" className="assetLogo" />
                    {tokenOne.ticker}
                    <DownOutlined />
                </div>
                <div className="assetTwo" onClick={() => openModal(2)}>
                    <Image width={30} height={40} src={tokenTwo.img} alt="assetOneLogo" className="assetLogo" />
                    {tokenTwo.ticker}
                    <DownOutlined />
                </div>
            </div>
            <div className="swapButton" disabled={!tokenOneAmount || !isConnected} onClick={fetchDexSwap} >Swap</div>
        </div>
In the code above
First the
divtag with the classtradeBoxcontains the exchanges ui where swap token prices are displayed and exchanged.Secondly the
Popoverfromantddisplay the slippage for the token priceInputallows the user to input the value amount of the token in which the user can trade.The swap button functionality performs the swapping of tokens.
Add the modal component above the tradeBox class to handle the selection of token to swap and wrap the entire element with the react fragment.
<>
        <Modal
            open={isOpen}
            footer={null}
            onCancel={() => setIsOpen(false)}
            title="Select a token">
            <div className="modalContent">
            {tokenList?.map((e, i) => {
                return (
                <div
                    className="tokenChoice"
                    key={i}
                    onClick={() => modifyToken(i)}
                >
                    <Image src={e.img} width={30} height={40} alt={e.ticker} className="tokenLogo" />
                    <div className="tokenChoiceNames">
                    <div className="tokenName">{e.name}</div>
                    <div className="tokenTicker">{e.ticker}</div>
                    </div>
                </div>
                );
            })}
            </div>
        </Modal>
Now we are almost done with the application with need to add the css style to give it the flare it deserved.
.tradeBox {
  margin: 10px;
  width: 400px;
  background-color: #0E111B;
  border: 2px solid #21273a;
  min-height: 300px;
  border-radius: 15px;
  display: flex;
  flex-direction: column;
  justify-content: flex-start;
  align-items: flex-start;
  padding-left: 30px;
  padding-right: 30px;
}

.inputs {
  position: relative;
}

/* ant */

.assetOne {
  position: absolute;
  min-width: 50px;
  height: 40px;
  background-color: #0b0b0c;
  top: 36px;
  right: 20px;
  border: 1px solid white;
  border-radius: 20px;
  display: flex;
  justify-content: flex-start;
  align-items: center;
  gap: 5px;
  font-weight: bold;
  font-size: 17px;
  padding: 10px;
}

.assetTwo {
  position: absolute;
  min-width: 50px;
  height: 40px;
  background-color: #0b0b0c;
  top: 135px;
  right: 20px;
  border: 1px solid white;
  border-radius: 20px;
  display: flex;
  justify-content: flex-start;
  align-items: center;
  gap: 5px;
  font-weight: bold;
  font-size: 17px;
  padding: 10px;
  transition: 0.4s ease-in;
}

.tradeBoxHeader {
  margin: 10px;
  display: flex;
  justify-content: space-between;
  align-items: center;
  width: 98%;
}

.assetOne:hover{
  cursor: pointer;
}

.assetTwo:hover{
  cursor: pointer;
}

.assetLogo {
  height: 22px;
  margin-left: 5px;
}
switchButton {
  background-color: #3a4157;
  width: 25px;
  height: 25px;
  align-items: center;
  justify-content: center;
  display: flex;
  border-radius: 8px;
  position: absolute;
  top: 86px;
  left: 180px;
  color: #5F6783;
  border: 3px solid #0E111B;
  font-size: 12px;
  transition: 0.3s
}

.swapButton {
  display: flex;
  justify-content: center;
  align-items: center;
  background-color: #243056;
  width: calc(100%);
  height: 55px;
  font-size: 20px;
  border-radius: 12px;
  color: #5981F3;
  font-weight: bold;
  transition: 0.3s;
  margin-bottom: 30px;
  margin-top: 8px;
}

.swapButton[disabled] {
  background-color: #243056;
  opacity: 0.4;
  color: #5982f39b;
}

.swapButton[disabled]:hover {
  cursor: not-allowed;
  background-color: #243056;
}

.swapButton:hover {
  cursor: pointer;
  background-color: #3b4874
}

.tokenLogo {
  height: 40px;
  width: 40px;
}

.modalContent {
  border-top: 1px solid #363e54;
  /* padding-top: 20px; */
  margin-top: 20px;
  display: flex;
  flex-direction: column;
  gap: 10px
}

.tokenChoice {
  display: flex;
  justify-content: flex-start;
  align-items: center;
  padding-left: 20px;
  padding-top: 10px;
  padding-bottom: 10px;
}

.tokenChoice:hover {
  cursor: pointer;
  background-color: #1f2639;
}

.tokenName {
  margin-left: 10px;
  font-size: 16px;
  font-weight: 500;
}

.tokenTicker {
  margin-left: 10px;
  font-size: 13px;
  font-weight: 300;
  color: #51596f;
}
Next, create a custom css from the antd which override the styling.
.ant-input {
  background-color: #1f2639 !important;
  color: white !important;
  border-width: 0px !important;
  height: 96px !important;
  margin-bottom: 5px;
  font-size: 35px;
  border-radius: 12px !important;
}

.ant-input::placeholder {
  color: #5f6783 !important;
}

.ant-popover-arrow {
  visibility: hidden;
}

.ant-popover-title {
  color: white !important;
}

.ant-popover-title {
  color: white !important;
}

.ant-popover-inner-content {
  color: white !important;
}

.ant-popover-inner {
  min-width: 260px !important;
  min-height: 140px !important;
  border: 1px solid #21273a;
  background-color: #0e111b !important;
}
Now back to index.jsx and add the swap component in the mainwindow class
<main className='mainWindow'>
        <Swap isConnected={isConnected} address={address} />
</main>
Great Job the Ui is looking good reward yourself for a job well done.

What’s Next?
So, you've made it this far! That's awesome and it tells me that you're enthusiastic about creating Web3 apps. Now, if you're feeling up for it, I have some ideas on how you can take your app to the next level:
How about giving users the ability to see the List of tokens the user have in their wallets? It could make your app more user-friendly and convenient to see the available token the user has to trade with.
You could also experiment with using other blockchain networks instead of Ethereum which gives the user the ability to make cross-chain transactions.
Conclusion
That is it for this article. I hope you found this article useful, if you need any help please let me know in the comment section or DM me on Twitter.
Let's connect on Twitter and LinkedIn.
👋 Thanks for reading, See you next time